No Utility Room? Here's How to Build a Laundry Zone That Actually Works
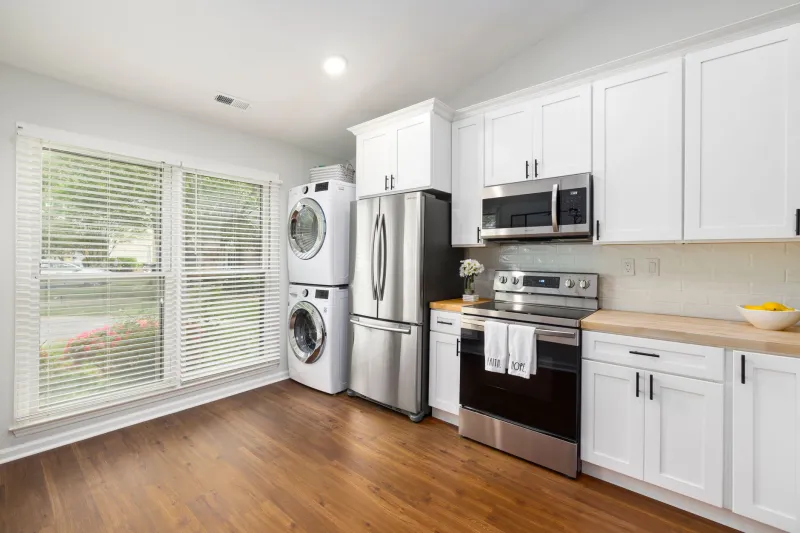
There is a particular kind of envy reserved for people who have a utility room. A door you can shut. A tumble dryer that doesn't hum through dinner. Somewhere the ironing board lives permanently instead of being wedged behind a wardrobe. If your house doesn't have one, you are in the overwhelming majority. Very few British homes do, and new-builds in particular tend to squeeze the washing machine into the kitchen and hope for the best.
The good news is that a laundry zone isn't the same thing as a laundry room. It's a corner, a cupboard, a run of units. Get the unglamorous bits right first, and the rest is styling. Get them wrong and no amount of wicker baskets will save you.
Start with the three connections, not the appliances
Before you fall in love with a stacking kit, work out what your chosen spot can actually support. Every washing machine needs water in, waste out, power, and somewhere for the damp air to go.
Water in is usually the easy part. Most machines are cold-fill only now, so a single supply is enough. If you are moving a machine away from an existing kitchen run, a plumber will need to tee off a supply and run it to the new spot, which usually means lifting a floorboard or two.
Waste out is where optimistic plans fall apart. The machine needs a standpipe or an appliance trap with a proper upstand, and the pipe needs a fall on it. Under-stairs cupboards and hallways often sit below the drain run, which is fine, but they can also sit a long way from it. Ask a plumber before you buy anything.
Power means a dedicated socket, not an extension reel poked under a worktop. Bathrooms are their own world: sockets near baths and showers are tightly restricted, so any bathroom laundry plan needs a qualified electrician, full stop.
Air is the one people skip. A vented dryer needs a hole to the outside. A condenser or heat-pump dryer needs space to breathe and a room that can cope with the moisture it releases. If the cupboard door is shut all day, that moisture is going into your walls.
Where a laundry zone genuinely fits
The end of a kitchen run. The classic. A 60cm machine slots under the worktop, and if you use an integrated model with a cabinet door on the front, it disappears into the kitchen entirely. This is the tidiest option for open-plan living, because nobody wants a porthole staring at them from the sofa.
A hallway cupboard. Under-stairs spaces are often exactly the right width. Measure the opening, then measure it again, because you need clearance for the door swing and around 5cm behind the machine for hoses. A stacked washer-dryer will sit around 170cm tall, so check head height while you're at it.
A bathroom. Perfect for plumbing, awkward for electrics, and slightly odd for hanging space. It works well in flats where the bathroom is the only room with a drain nearby.
A landing or airing cupboard. Great for storage and drying, less good for plumbing. Airing cupboards that once housed a hot water cylinder are often where the boiler now lives, and combi boilers don't leave much spare warmth for drying towels any more.
Stacking, and the height nobody mentions
Stacking is the single biggest space win available to you. A washer with a dryer on top takes up 60cm of floor width instead of 120cm. But a stacked tower needs a wall-fixing kit, because a dryer balanced on a spinning washer is a genuine hazard, and the washer should always go at the bottom.
Think about reach, too. If you are 5ft 2in, the dryer drum door at the top of a tower is at eye level, and lifting a wet duvet cover out of it is not a joyful experience. Side-by-side under a worktop is easier on the body if you have the width to spare. A pull-out plinth drawer for detergent is worth considering if you are having joinery made anyway.
Slimline appliances: where the extra 15cm goes
Standard machines are 60cm wide and roughly 60cm deep, which is why so many of them stick out past the kitchen units. Slimline models are typically 45cm deep, sometimes 40cm, and they buy you back the walkway in a narrow galley kitchen or a tight hallway.
The trade-off is drum size. A slimline machine might wash 7kg rather than 9kg, and a slimline washer-dryer might dry only 4kg. Be realistic about a family wash load, then decide whether the floor space is worth it. Also check which side the door hinges on, because a machine that opens into a doorway is a daily irritation.
Look at the spin noise figure as well as the energy rating. Anything around 70dB or under is reasonable; a loud spin cycle in a hallway cupboard will be heard in every bedroom above it.
Give yourself somewhere to put the basket down
This is the bit that turns a corner from functional to civilised. You need a flat surface roughly 60cm by 40cm where a basket can sit while you sort, fold and stack. Options, in order of cost:
- A wall-mounted drop-leaf shelf that folds flat when not in use
- A heat-resistant pull-out shelf above the machine, set into the worktop
- A length of worktop over a freestanding unit next to the machine
- The top of a slimline cupboard, if the height works for you
Alongside it, keep two baskets: one for clean washing waiting to be put away, one for the odds and ends. Decanting detergent into glass jars looks lovely on Instagram, but keep the original bottle nearby for dosage instructions and safety warnings, and keep everything locked away if there are small children in the house.
Drying without turning the house into a greenhouse
A single wash load can put a couple of litres of water into the air, and that water has to go somewhere. In a well-sealed modern flat it goes into the walls, the window reveals and the back of the wardrobe.
So: use an extractor fan if the room has one, keep trickle vents open, and consider a dehumidifier running alongside a heated airer. A ceiling pulley, if you have the ceiling height for it, is still the most elegant drying solution in a British house, and it costs nothing to run. Heated airers are gentler on jumpers than a tumble dryer and cheaper than running one. Avoid draping damp washing over radiators, which is a fast route to condensation and black mould on the wall behind.
Now make it look like it belongs
With the plumbing sorted, the styling is straightforward. Pick one idea and commit to it rather than layering five.
- Hide the tower. A simple café-style curtain on a ceiling track, or a pair of made-to-measure doors, turns a stacked machine into joinery. Choose a fabric that can be washed.
- Match the front. If the machine sits in a kitchen run, an integrated cabinet door is the difference between a design decision and an appliance parked in a room.
- Keep a tray. A shallow tray or a metal tray keeps bottles, cloths and a brush together, and stops the lot sliding around on a worktop.
- One accent colour only. A terracotta basket, a sage linen curtain, a warm oak shelf. Two is a scheme, three is a jumble.
- Put a light in. A small battery LED or a sensor light in the cupboard makes the whole thing feel considered, and means you can see the sock you dropped.
A quick buying checklist
Measure the space including the door swing and at least 5cm behind the machine. Confirm the drainage route with a plumber. Decide between integrated and freestanding, checking drum sizes for slimline models. Budget for a stacking kit and a drip tray. Add a folding surface and two baskets. Then, and only then, choose the pretty bits.
A laundry zone doesn't need a room of its own. It needs three connections, a bit of air, and somewhere to put the basket down. Everything after that is decoration.